Its-Licious: Behind The Tech Scenes
Its-Licious was the first self timed project that I’ve ever undertaken. The goal was simple: 48 total working hours to build this idea from scratch. The time li…
· 12 min read
A deeper look into some of the technical challenges
Note: This was written back in January 2018 when I first released this project to make it for Toronto Winterlicious earlier in the year. I’ve made some updates to the site since then.
Its-Licious was the first self timed project that I’ve ever undertaken. The goal was simple: 48 total working hours to build this idea from scratch. The time limit included designing the application, coding it, and then releasing it.
Here I’ll be walking you guys through some of the problems and complexities I faced throughout this process. I’ll be skipping the design portion of it, and will be leaving that to another piece at a later date.
The Final Product Now:
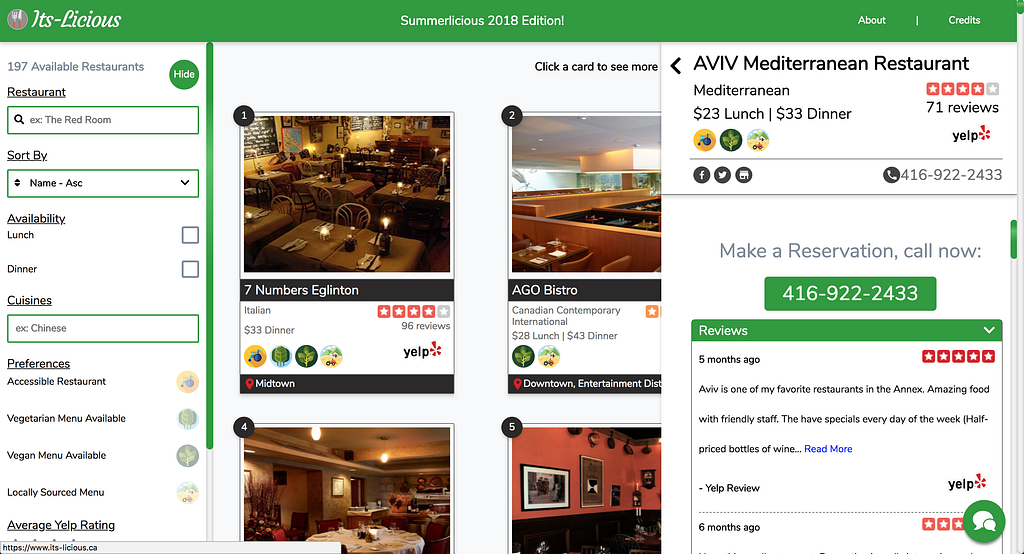
Check it out on www.its-licious.ca
As part of the MVP (Minimum Viable Product) I wanted to incorporate a large list of features including:
-
integrating Google Maps because everyone needs maps
-
making the website responsive using Flexbox (more a challenge to myself)
-
integrating Google and Yelp review data
-
having a hosting provider that could host for free
All of this, with the fun caveat, that I had to fit it in under 48 hours as part of a timed challenge I was putting myself through. Taking away the time I spent putting together the visual designs for the application, that left me a whopping grand total time left of: 33 hours.
**33 hours. **33 hours to get everything done, and hosted and then published.
Could I do it?
Is it even possible to get everything done in only 33 cumulative hours?
Fortunately, I did.
Total Time Spent Coding: 31.5 Hours
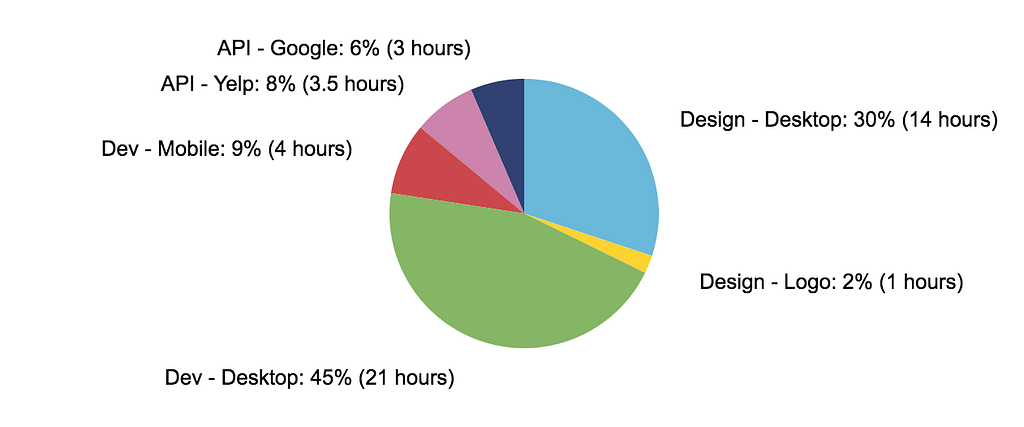
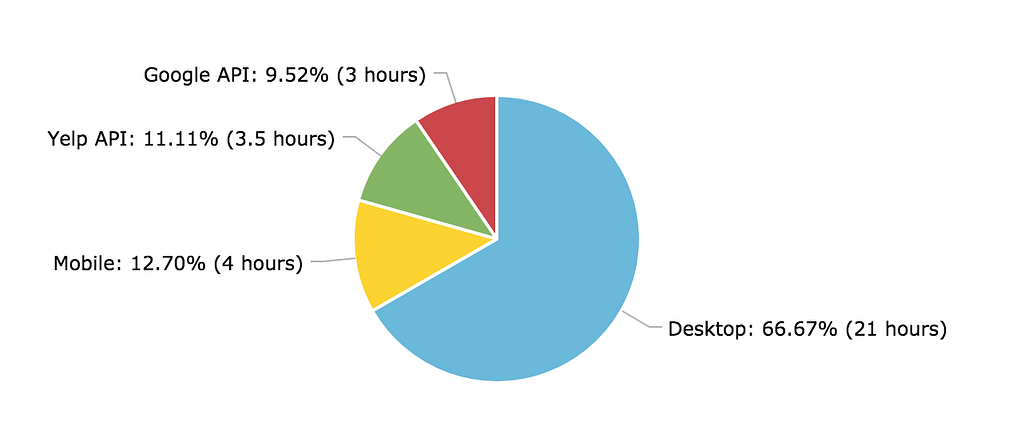
31.5 hours (just 1.5 hours shy of the limit); spread over 6 days, to connect to the Google and Yelp APIs, to build the front end from scratch, to make it mobile responsive, to sneak in any extra features that I thought of, and to also fix any bugs.
Overall, not a whole lot of time to put in a rather large list of features.
Was it the smartest move to have an extensive list of features as the MVP list?
Was it worth adding in more features but sacrificing some of the polish?
Did this even end up making the end product better in a way?
I think this question is hard to answer without really talking to users and getting their thoughts, but I think from a developer point of view, it was one hell of a challenge to myself. And a challenge, that I’m pretty proud to say that I conquered. Now let’s take a look at some of the nitty gritty.
Making it Mobile Friendly
In the design process, I had opted to not make designs for a mobile view as I made the assumption that the majority of my users would be viewing this on desktop and so I prioritized only doing desktop designs.
Interesting to note, only 39% of users viewed it on desktop compared to 57% on mobile.
During the design, I did put some consideration for mobile when I was creating it, to see what could be easily translatable to mobile.
Taking a look at an example would be the filters column that sits on the left side on desktop. This was a component that I had purposely designed in a column format sitting on the left side, so that on mobile, it would be easy to use it as a component that could take up the full height and width of the screen when in view, but would also be easy to hide via a button.
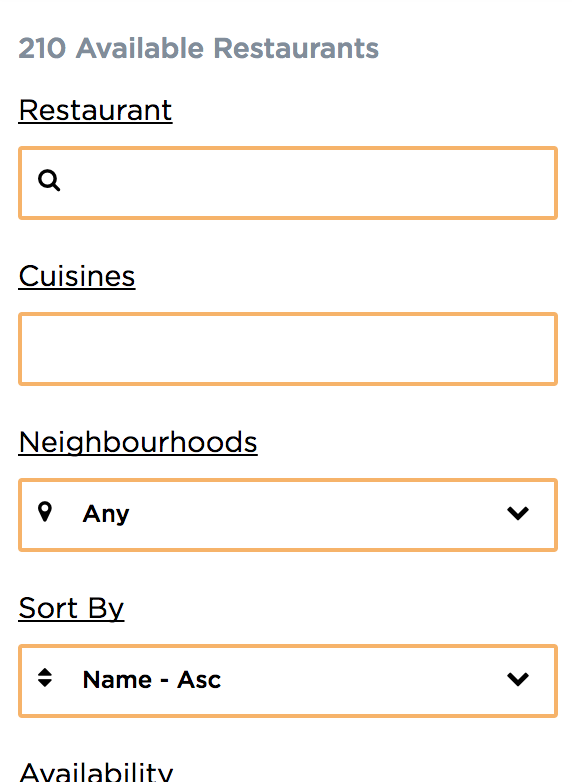
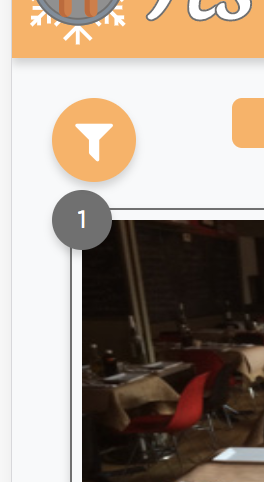
I’m particularly pleased with this piece due to how easy it was to integrate into mobile.
All I really had to do was enable one breakpoint for mobile where it would be by default hidden, until you explicitly clicked a button to show it. Zero effort required.
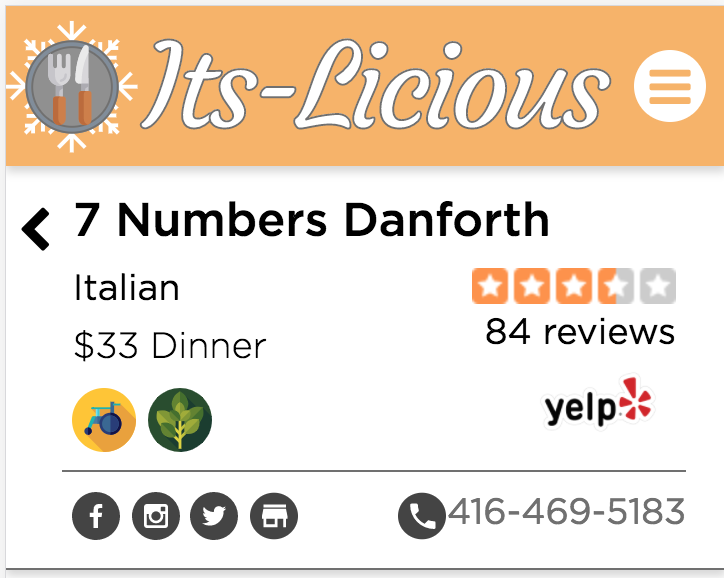
Similarly, the expanded restaurant card functions in the same way. Under a breakpoint its by default hidden, and by clicking a button, we can get it to show, and have it take up the full width and height of our device.
Again, zero effort required.
Another example of a component that was designed with mobile compatibility in mind would be the restaurant gallery.
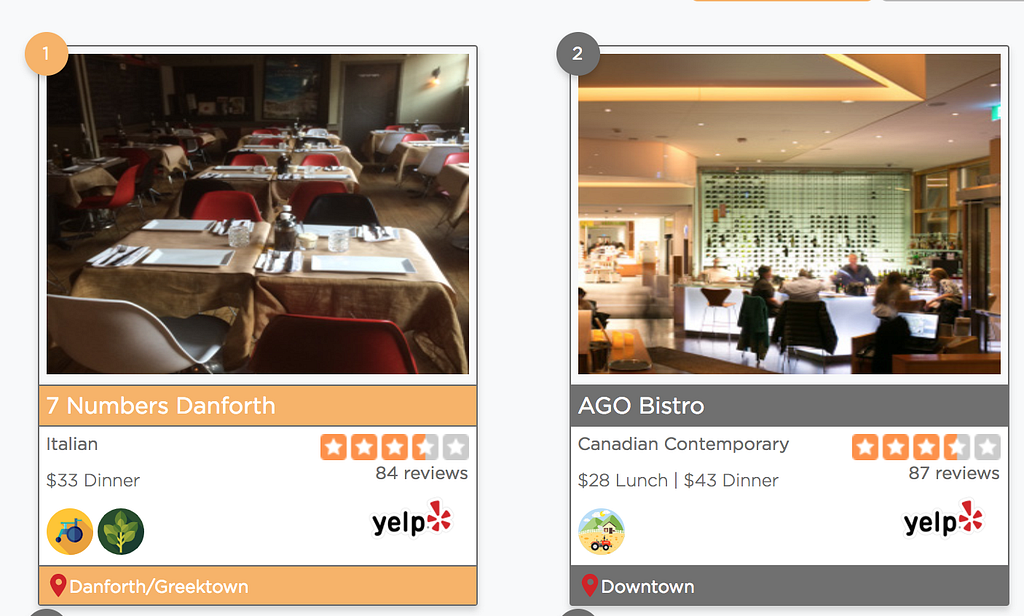
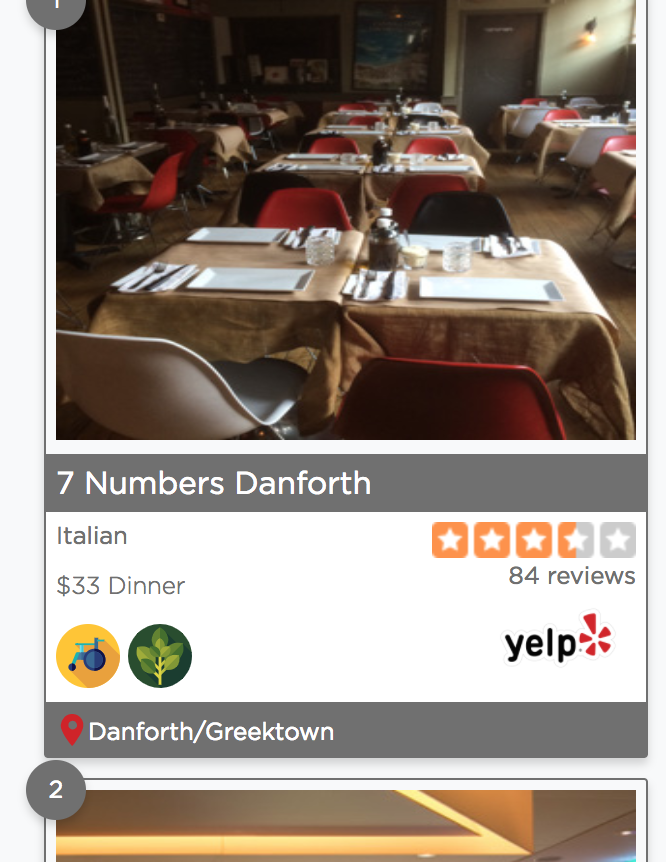
Using the magic of Flexbox, it was easy for me to design a grid system that would automatically adjust to the height and width of the screen. On larger screens, I could have the gallery expand to fill the screen, but on mobile, narrow itself down to fit what it could.
This was the first project I had done that tried to fully utilize the magic of Flex layouts, and I’m pretty proud of the fact that I was able to use it.
What gives me a little smile in this project is that I was able to make this grid system work, especially when I wasn’t making use of any CSS frameworks like Bootstrap or the Material Framework.
That brings me to the next point, not using any CSS frameworks.
Going Barebones with CSS
It was actually a lot of fun to build this project without any CSS frameworks backing it up. My go-to is Bootstrap but I wanted to make this project as lightweight as possible, so I opted to go without it.
Because there’s no framework, you know exactly how an element is supposed to look like, and it does exactly what it should do because you coded it that way. You don’t have to worry about weird inheriting rules, or random style declarations coming forward because you named an element with a specific class name that the framework also happened to use. The major downside of going without a framework is that cross-browser compatibility definitely is more challenging.
One benefit of the frameworks is that they’ve probably tested their code against many browsers, many times. From IE to Firefox, to Safari and Chrome. Your own custom CSS? Not tested as many times against as many browsers. There definitely was some time lost coming up with special solutions to specific browsers because they decided they didn’t want to follow the rules of flexbox like everyone else did (I’m looking at you Internet Explorer).
Getting the Data
So where did I actually get the data to use for this website? When I was checking out the Winterlicious site from the City of Toronto, I was curious as to how they were getting their own restaurant data. Turns out, when you inspect their network traffic using the Chrome Developer Tools — Network Tab, you see that they have a link to something called restaurantURL.
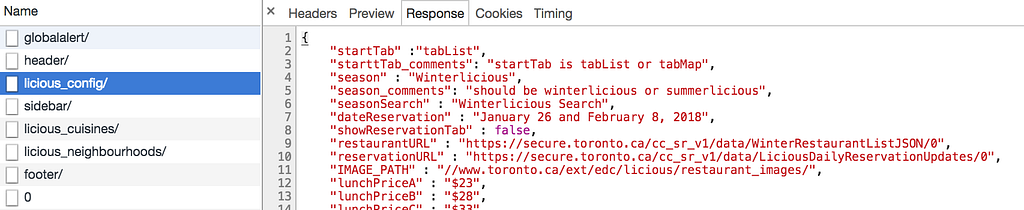
If you actually visit the restaurantURL link, it links straight to a JSON file that contains all the participating restaurants for Winterlicious, as well as information pertaining to that restaurant, which ends up looking like something below.
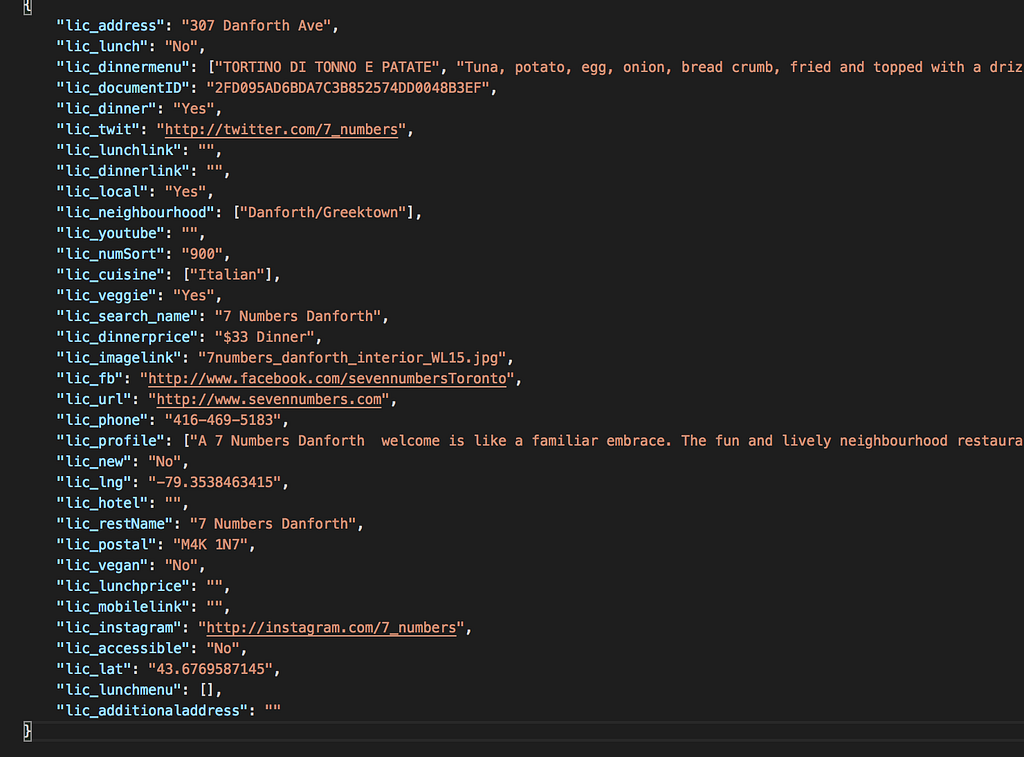
The data provided tonnes of information include latitude & longitude, links to OpenTable to make online reservations (where applicable), as string arrays containing their actual menus (when provided). Now that I knew where the data was coming from and it was publicly accessible, I decided to just copy the information and store that locally for my own access.
What they didn’t have however, which was a big factor for me doing this whole project, was Google and Yelp ratings and reviews. How can you know where you want to eat, without knowing what the reviews were?
Getting Google and Yelp Data
So at a high level, it sounds pretty simple to get the Google and Yelp data. Just plug in a name, and you get information. Easy, right?
Let’s take a look at Yelp first. My initial assumption was that there was some API I could call with a restaurant name, and a magical list of reviews and ratings would come forth. Well, I was partially right.
In order to get the reviews and ratings of a business, you need the Yelp ID for the business. But how do you get the Yelp ID? Well, luckily there’s an API for that as well.
https://www.yelp.com/developers/documentation/v3/business_match
Here’s the fun part. In order to get the Yelp ID you can make a request to the business lookup API with a tonne of parameters. We can include the restaurant name, the longitude, latitude, address, phone number and everything else we have. This would return to us a **best match. **We don’t actually know if its 100% correct, its just probably the right one.
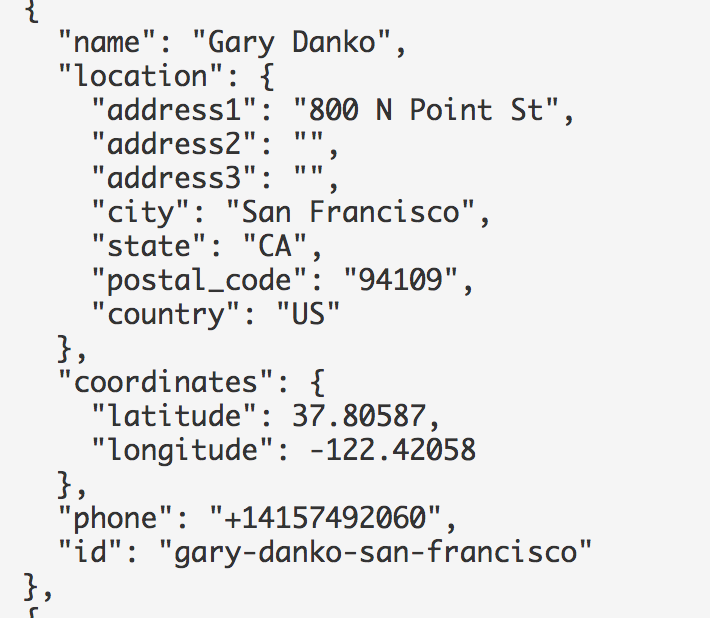
This returns to us, something like so. Really, the only thing we actually wanted from this call, is the id field, which is the yelpID of the business.
Now using the YelpID we can make a call to the business API and the reviews API to get the data.
But, let’s take a moment to break this down, in order to just get the latest reviews and ratings we had to :
-
Make a call to the Lookup API to get a Yelp ID
-
Make a call to the Business API to get its average Rating
-
Make a call to the Reviews API to get latest 5 reviews
Making 3 calls every time to get restaurant information definitely doesn’t sound ideal, so how do we optimize this? Well, we can store the Yelp ID in the JSON file that we copied previously since that’s a static string.
We can also store the rating since a restaurant’s rating is generally pretty static, and doesn’t usually have major fluctuations. What about optimizing the reviews fetching? I’ll talk about that in a moment.
Getting the Google Data is relatively the same process. To get Google Reviews, we need to call the Places API, but the Places API needs a Google Place ID.
How do we get a Google Place ID? Well, we can use the Google NearbySearch API as well as the Google TextSearch API. The Google NearbySearch and the TextSearch both operate pretty similarly. They both take in a set of search parameters and they return you the best bet. After using them, I found the Google TextSearch API to be much more accurate than the NearbySearch API, but it comes with a downside. Each API call to the TextSearch API is equivalent to 10x calls to the NearbySearch API. Now granted, the API limit for Google Map calls for free is 150,000 calls per day, but still, we want to minimize that where possible.
Whether you use the NearbySearch or the TextSearch, you end up with a Google Places ID. Now using this ID, you can now call the Places API to retrieve Google ratings and reviews for a restaurant.
Let’s do the breakdown again.
-
One call to NearbySearch to get the PlacesID
-
Optional call to TextSearch to get a PlacesID in case NearbySearch didn’t return a match
-
Call to Places API to retrieve ratings and reviews
Again, we’re looking at potentially 2 to 3 calls per restaurant to get data. We can store the Google Places ID in the JSON file, as well as the ratings again.
I put together a node script that would call the APIs and store IDs and ratings of the restaurants back into the JSON file that the restaurants are found in.
Now comes the question, how do we want to deal with the freshness of the review data for both Google and Yelp? I ended up debating between two implementations.
The first was that I would make a new Google and Yelp API Request for every restaurant every time that restaurant gets loaded.
Pro: Always up to date review and rating data
Con: Have to get the data for each restaurant as a separate request.
Doing some *quick maths: *there are 210 restaurants available for search. That meant that to get the data for all the restaurants would require 210 Yelp requests, and 210 Google requests. On the first day of release, I had 342 users visit the application.
342 users x 210 restaurants x 1 API request
=71,820 requests Yelp or Google API requests in a day
=143,640 total requests in a day.
That sounds like a lot of requests for something really simple, and it is. We’re lucky that Google allows us to make 150,000 free calls per day so we’re safe on that API. But what about Yelp? Well, Yelp only provides 25,000 free requests per day. So right away, this option doesn’t work.
The second option, was to just retrieve all the ratings and reviews once, and store that all in the JSON file as well.
**Pro: **Do it once, never worry again
**Con: **Data won’t be fresh, it’s static and soon to be stale data
Again, some *quick maths. *With option 2, we only have to call the APIs once for the data, and then we can just reuse the data each time. We need a total of 3 Yelp API calls to fetch all Yelp data, and a maximum of 3 Google API calls to fetch all Google Data.
3 Yelp API x 210 restaurants + 3 Google API x 210 restaurants
= 1,260 total request calls
1,260 calls sounds a lot smaller than 143,640 calls. If you haven’t guessed, I ended up going with option 2 here.
If I had more time, I’d be interested in trying to figure out whats to optimize performance and request usage using option 1, but for this given challenge, I went with what’s easy.
Another key thing is that even though data is stale, it only becomes a real issue when users notice it becoming stale. Given the uniqueness of the project, and how it’s only good for a certain time of year, I didn’t think people would really notice.
Its not a bug if no one knows about it.
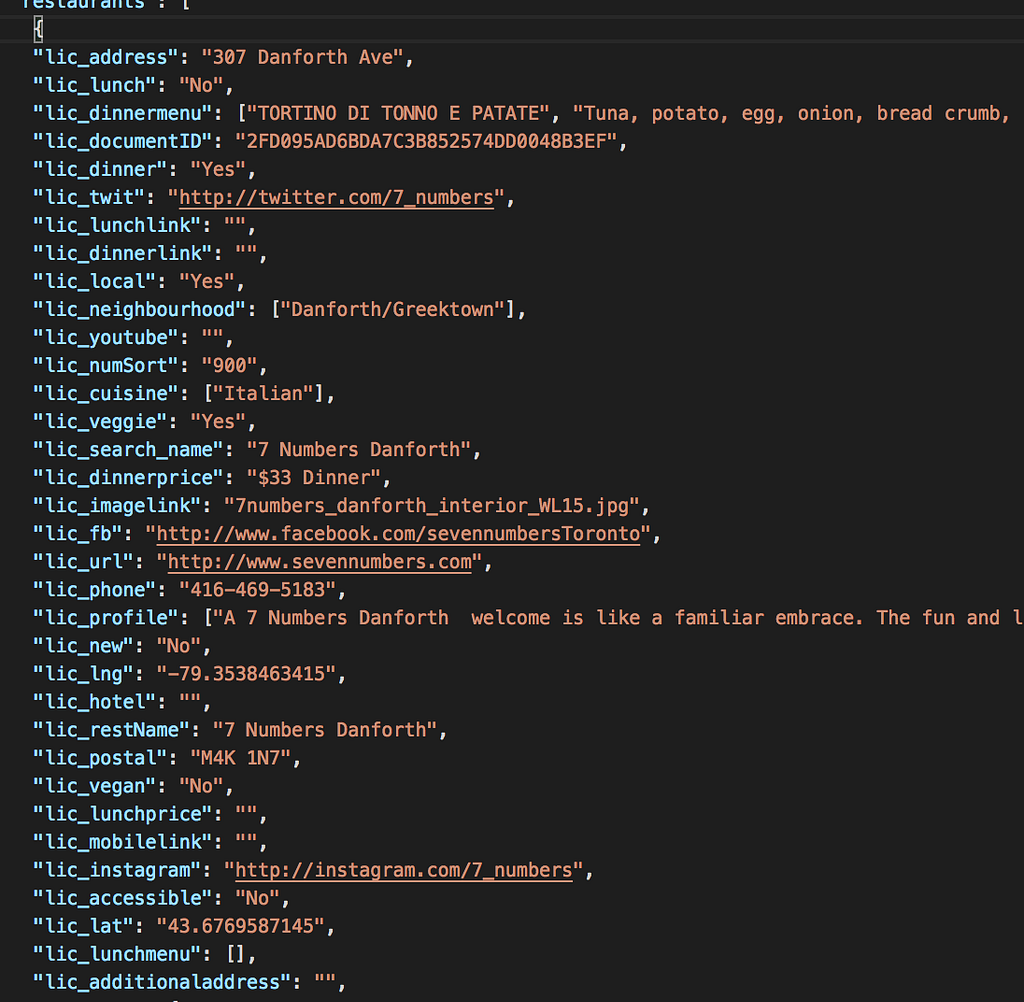
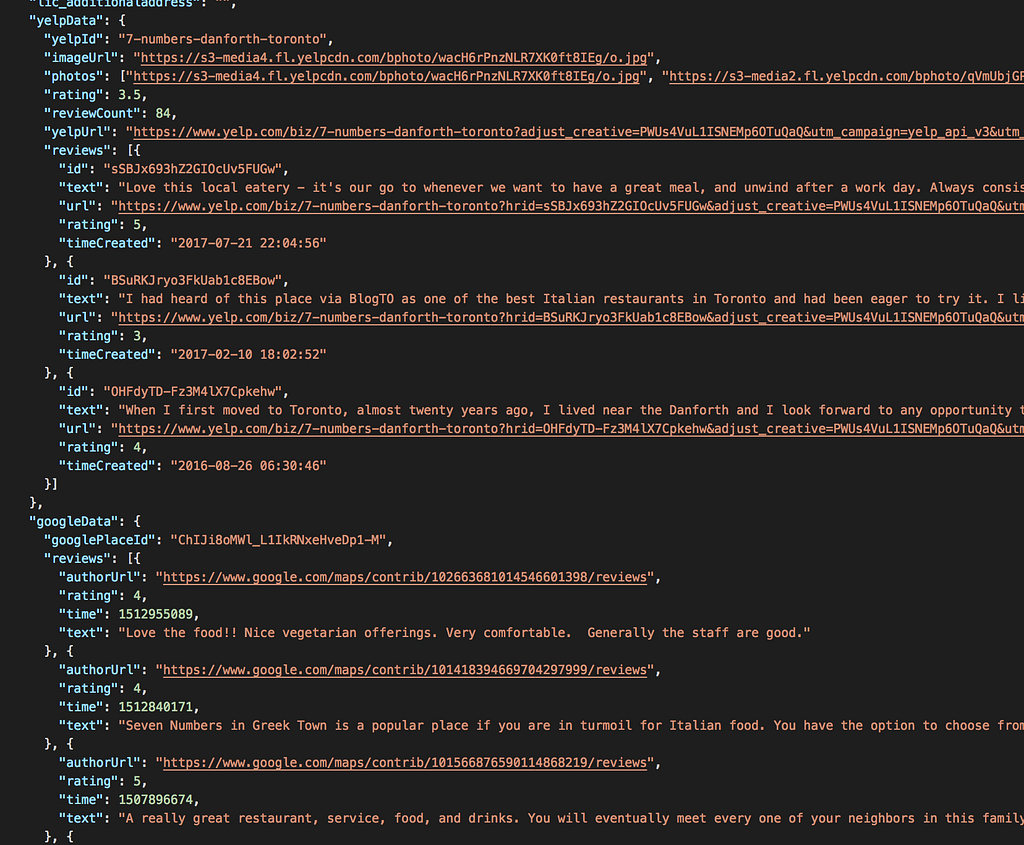
The complete JSON data for a restaurant ended up looking like this:
Deployment
For this project, I wanted to put something together as fast and cheap as possible. I definitely had the option to put it up on AWS since I had some experience with it, but I wanted to see if there was a way I could do the deployment for free.
Luckily, **GitHub **has something magical called GitHub Pages. Essentially, GitHub will host your static page **FOR FREE **as long as its sitting on a GitHub Repo. Now, this won’t work if your application is an always-on server, or is backed by serverless technology. It will only for static web pages. Fortunately, a static web page was exactly what I was building.
Using angular, there’s some nifty stuff out that there that simplifies the whole process, and you can read more about it here.
Basically, as long as my code was sitting on GitHub, I could leverage GitHub Pages to have free static hosting! Hurrah! Because there is no backend server, or database, GitHub Pages was all I needed to have my site up and running.
And that is the whole process. There’s definitely a lot of smaller problems and challenges that arise, but I think these were some of the ones that really stood out to me and/or took up most of my time. Definitely a lot of learnings, but overall a great experience, and I definitely loved this concept of timed challenges, and I hope to continue doing more of these type of projects!
If you enjoyed what you read, leave a comment and let’s talk!
If you want to take a look at an analytical breakdown of the project, check out my article here.
If you want to see the site in action, check it out on www.its-licious.ca
Stay tuned for other write-ups coming soon that are also related to the project such as: the design process, and the inspiration behind it all.
Its-Licious: Looking at the Data
I think one of the most interesting parts of any project is looking at the data, and seeing any interesting trends or highlights. For this project I used Google…
DiscoverHumble: The Problem with the HumbleBundle Library
I’d like to think of myself as a somewhat avid gamer, and in my opinion, any avid gamer should be familiar with HumbleBundle. For those who might not be a gamer…